Slow Conversations

Numeric Citizen, recently wrote about slow but delightful conversations via email:

One advantage of email is that it allows for more thoughtful and deliberate communication. Unlike instant messaging or phone calls, where responses are often quick and on the spot, email will enable individuals to take their time to compose well-thought-out messages. Email communication allows for more thoughtful and well-considered responses thanks to its asynchronous nature. Unlike synchronous forms of communication such as phone calls or instant messaging, where there is an expectation of immediate responses, email allows individuals to carefully craft their messages and review and revise them before sending them. This contributes to clearer and more accurate communication, as people can take their time to gather information and reflect on their thoughts before replying.

I've always thought of email in its purest form being akin to writing a letter. There's an expectation that comes with it, that you won't necessarily receive a reply very quickly after writing to someone. And this changes the dynamic and the attitude towards how emails (and letters) are written.

However, as much as I enjoy the process of writing and reading emails. My realistic experience of email is that my inbox is usually a mess. Various order confirmations, random deals or sales from annoying brands/stores, newsletters that I've forgotten to unsubscribe from, and random ones like "you've just signed in via a new device" or "we've updated our terms and conditions".

I've been thinking of a solution, and the only thing I've come up with is to have a completely separate email address for communicating with people. And to try as hard as possible to keep spam away, newsletters, account updates, etc.

So, for now, I've created a new email address just for that purpose, chris@chrishannah.me. At some point, I'll add this a "reply via email" button to my posts, but for now, it can sit here.

One thing I would like to say about that email address is that I will be very stringent on spam emails. It's for conversations between people only. Let's see how it goes.

Hidden Bar - A Minimal Menu Bar Solution

Having a menu bar full of apps is a common problem on macOS, and for a while, the agreed upon solution was Bartender. However, the problem with Bartender is that it's grown quite substantially over the years. So if you just want to a quick way to clean up your menu bar, it's probably not the most suitable product anymore.

Thanks, to Superbits (and ldstephens for the tip), there's a new app that addresses the problem in the most minimalist way possible, Hidden Bar.

Hidden Bar

It's a totally free app. And all it does, is add a separator icon to your menu bar, which you can place to the right of the icons you want to hide. And then another icon that you can use to toggle the visibility of those extra icons.

There's also an auto-hide preference, so after expanding, they will automatically hide after a specified number of seconds.

It's literally a perfect solution for a very common problem. And it doesn't come with any kind of bloat at all.

I love these kind of apps.

My Blog Isn't a Perfect Moleskine Notebook

One of the biggest problems that I have with my blog, is that I spend too effort making it look nice.

Not that it takes my time away from writing, or that it's not important. I definitely appreciate the effort I take with the design of my blog.

The problem is, I appreciate it a bit too much.

My blog currently has around 336k words across 1k or so posts. So I'd say there's a fair bit of writing here.

But when I spend too much time refining the design of the blog, it makes me want to only publish the most elegant and perfect essays. It starts to feel like a brand new notebook where you try to write as neatly as possible, never making a mistake, etc.

That’s why at times I’ve written posts along the lines of “This is how I want to write for my blog” before. I guess it's some kind of pre-emptive warning to try and set the readers expectations. But I think it was more for my benefit than for anyone reading.

At the same time, I don't want to belittle that type of blog post. Because I think it has its use. While, it may not serve any use on its own, it gets the ball rolling. Whatever friction was there before has been slightly reduced.

Maybe that's why bloggers always talk about writing regularly and being consistent. For me, it seems that biggest factor that helps me write for my blog is momentum.

My blog isn't a perfect Moleskine notebook. It's a old and battered collection of notes, photos, longer pieces of writing, and all sorts of scribbles and mistakes. And sometimes I need to remember that.

Early Impressions of macOS Sonoma

I've been using Sonoma now for just a few days now, but there are a few things that I'm already impressed by.

Wallpapers

The first being the new animated wallpapers, and how they transition from the Lock Screen to the desktop. It's such an Apple feature, which I don't feel like we've had for a while. The Lock Screen having an animated wallpaper would be great on it's own, but the fact that it slows down, and then settles on a frame is 10x better.

(I've just been going between the various Scotland options so far.)

Web Apps in the Dock

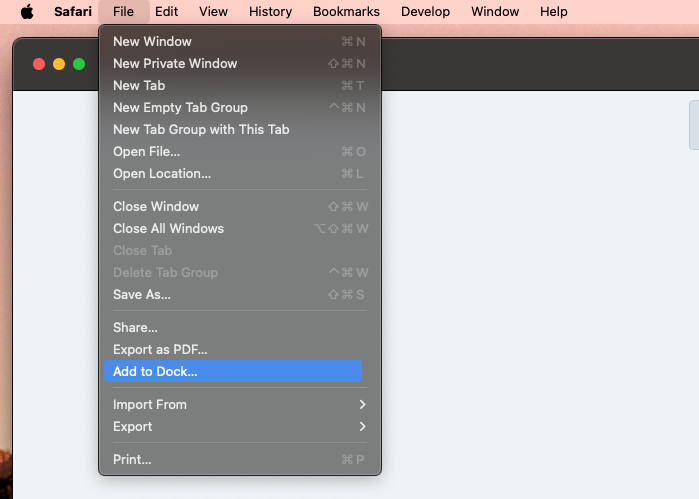
Then I've got to mention having web apps in the Dock. I've already got 2 configured on my personal machine, Fosstodon, and Chess.com. And I've also set a few up on my work machine, for common web apps that I use, like, for example, our document management tool. Sometimes websites don't have apps, and sometimes the website is just better than the app, so I think I'm going to end up using these a lot.

Another bonus for this feature, is that if you view a website that you have added to your Dock, in Safari, it will prompt you to open it in the app instead.

Desktop Widgets

Finally, there's Desktop Widgets. These are so much more useful than having it hidden away in a menu.

I've currently got just Weather, Calendar, and NetNewsWire widgets at the moment. I'm not sure if I'll ever have a ton, but just having these few details in a place where I'll see them often will be very useful.

These aren't exactly groundbreaking features. But I don't particularly want the Mac to keep changing. So these little touches go a long way for me.

Day 1 Impressions of the iPhone 15 Pro Max

After owning an iPhone 13 Pro for two years, I received my new iPhone 15 Pro Max in the post earlier today. And I already want to share some of my very early impressions. Primarily because I'm very glad I upgraded to this model, and it's (obviously?) a very good upgrade from the 13 Pro.

Design

Starting with the actual design of the device, it's not too much different from recent models. I don't personally care what material is used, but I'm definitely a fan of the finish. And while the edges of the 13 didn't cause me any trouble, I am finding myself appreciating the slightly softer edges of the 15.

In both the 13 Pro and my new 15 Pro Max, I've chosen the colour closest to black. The 15 seems slightly darker in appearance, which I appreciate. My favourite colour so far was the black iPhone 5, but I think this is pretty close.

Action Button

I haven't set this up properly yet. Although I do envisage settling on having it launch either the standard Camera app or possibly Halide.

I can't say I have particularly strong opinions about it at the moment, but I think I'd prefer if the action was immediate, rather than requiring a long-press. Although, it would be better if you could configure different actions for a long-press or a typical button press.

USB C

Most of the time I've charged my 13 Pro via a MagSafe charger on my bedside table. However, I do have a Lightning cable in my work bag that I use occasionally, and I also prefer to take a cable when on trips. So USB C won't exactly make a huge difference to me. But it will certainly be handy to be able to have one cable for practically all of my devices.

Camera

I haven't used this too much yet. But I did play around with Portrait mode, and so far I've been very happy with the results. The adjustable aperture and focus point both work well, and while I don't know how often I will use them, they're good additions. I think all three cameras are different to my 13 Pro, so while I've been initially impressed, I want to spend more time with it to have any real opinions.

Speakers

I don't know if the speakers in my 13 Pro had deteriorated, or if an improvement came in last years or this years models. But the speakers seem much better. They're certainly louder than my iPhone 13 Pro, and they seem to also be clearer.

Dynamic Island

I want to separate my feelings on the Dynamic Island into two parts.

Firstly, it's clearly a bad thing to have a cutout in a display. It means that software either has to work around it, or completely disregard that area of the screen.

On the other hand, I do like what they did with the cutout. I like having quickly glanceable information there, like timers, food delivery times, and also the currently playing music. And I also like having the ability to tap it and quickly navigate to whatever is appearing. For example, tapping the now playing "bar" (not sure what this is called) to open the Music app is handy.

However, if I was given the option, I'd rather the cutout didn't exist at all.


My opinions on the 15 Pro Max will no doubt change as I use it. But as for right now, this is how I feel. I may write about it here again, or if not, I'll probably just post about it on Mastodon.

Text Shot 1.2

Text Shot v1.2 is now available!

With it, comes a new author field, and also a source field. Which means a text shot can contain a title, author, source, and the quote. This hopefully makes Text Shot become more usable when sharing quotes from books, and maybe a few other places that I haven't thought about.

Alongside the new fields, there's also a "Copy Alt Text" button. This, of course, generates and copies a description of the text shot, that you can upload alongside the image when you post it to sites like Mastodon.

Here's an example text shot:

And here is what the alt text would be for it:

A text shot containing the following information:
Title: Text Case CLI via Homebrew
Author: Chris Hannah
Source: chrishannah.me/text-case-cli-via-homebrew.html
Highlight: To use these formats, you can pass in input in three different ways - you can use the --input option to pass a string of text, the --in option to specify a file to use as input, or you can pipe in data from stdin.

There's also a bunch minor UI changes that no-one will probably notice. 😅

If you haven't already, you can find Text Shot for iOS and macOS on the App Store.

Text Case CLI via Homebrew

I wrote just a few days ago, about Text Case coming to the command line. And it's already time to announce that it's now available to install from Homebrew.

Okay, so it's not in the core tap, I have my own custom tap (maybe that will happen eventually). But it's still a pretty easy process.

All you need to do is:

brew tap chrishannah/textcase
brew install textcase

Then you'll be able to format text using the textcase command. Which is pretty easy. I used it myself to format the slug inside Neovim when writing this post.

While I'm here, I may as well explain what functionality is supported in the very first release of Text Case CLI.

To start off, the currently supported formats are:

  • stripHTML - Strip all HTML tags.
  • stripWhitespace - Remove all whitespace.
  • trimWhitespace - Remove any preceeding or succeeding whitespace.
  • clapCase - Put 👏 between every word.
  • hashtags - Convert words into hashtags.
  • rot13 - Reverse all characters.
  • shuffled - Shuffle all characters.
  • slug - Convert the text into a slug.
  • smallCaps - Convert all characters into small capital characters.
  • mockingSpongebob - Turn your words into something sarcastic Spongebob would say
  • upsideDown - Flip all characters.
  • capitalise - Capitalise the first letter.
  • capitaliseWords - Capitalise all words.
  • lowercase - Make all characters lowercase.
  • reversed - Reverse all characters.
  • uppercase - Make all characters uppercase.
  • sentence - Capitalise text as a sentence.

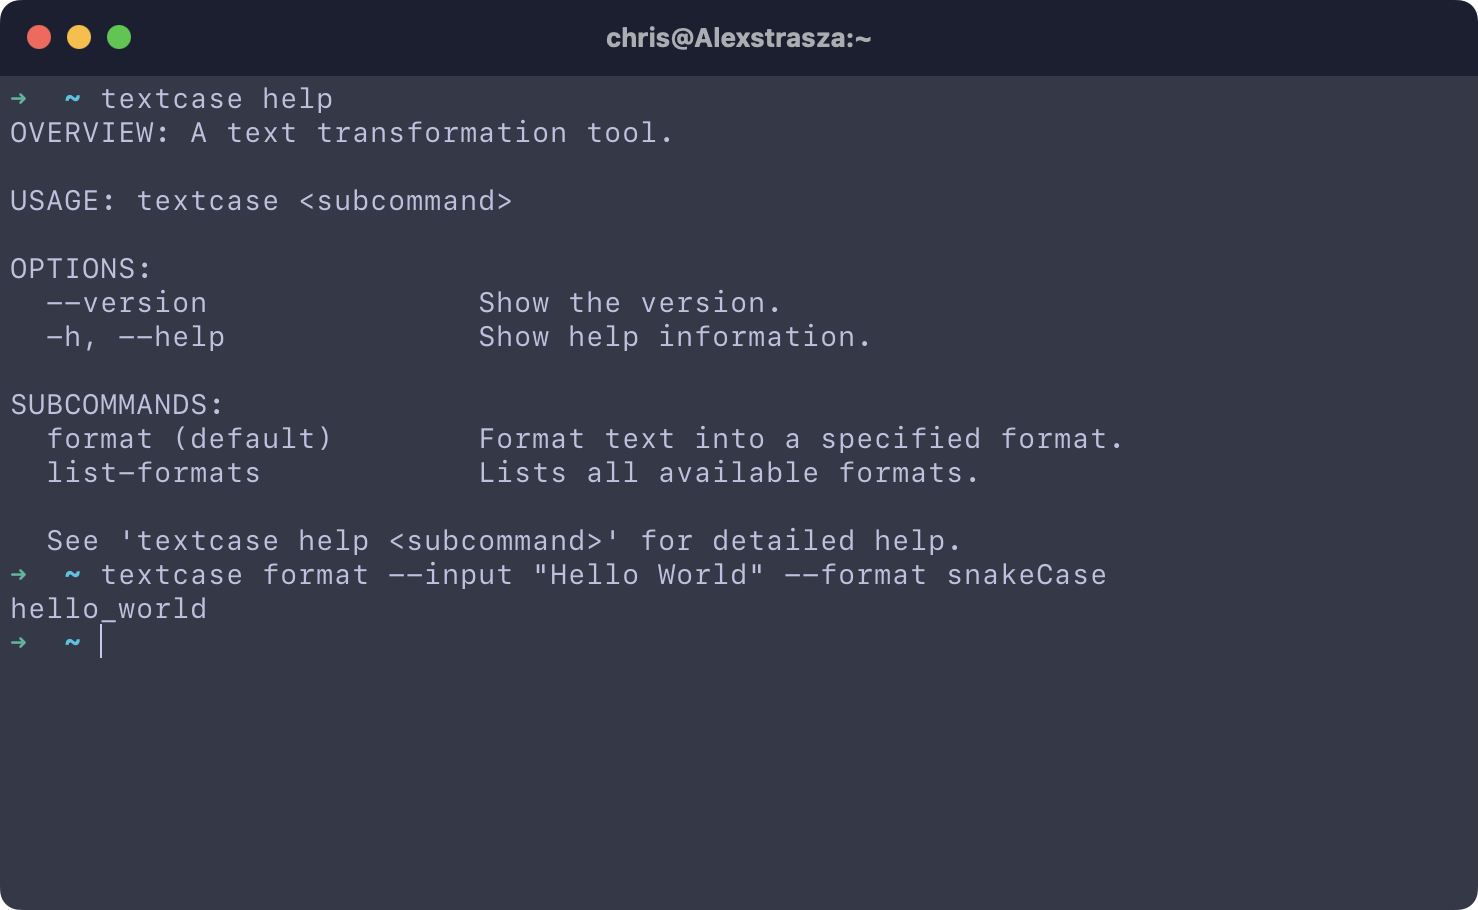
To use these formats, you can pass in input in three different ways - you can use the --input option to pass a string of text, the --in option to specify a file to use as input, or you can pipe in data from stdin.

The outputted string will be sent to stdout, but you can also use the --out option to have the resulting text written as a file instead.

If you have any questions or feedback about Text Case CLI, then feel free to email me, or you can find me on Twitter/X or Mastodon.

Written: while relaxing in a caravan in Wells-next-the-Sea.

Using a Swift LSP in Neovim

I spent quite a bit of time trying to work out how to get a Swift LSP working in Neovim the other day. Enough time that I wanted to share it here.

I won't go into too much detail about what an LSP is, how it works, or its benefits. There are a lot of other people who can do a much better job of that than me.

However, I would like to say that this is just how I have it working myself. There are bound to be many other ways you can get a Swift LSP working in Neovim. It just happens that this is a pretty simple configuration, that I will likely also improve in the future.

The first step is to obviously install the Swift LSP. Apple's one (I'm not sure if there are any others) is SourceKit-LSP. You can build this from source (this is what I did), or the README also explains that it's also included in the toolchains found on Swift.org. So do whatever is best for you. But, be sure that it is accessible on your $PATH.

After that, you'll need to configure Neovim to find the LSP, tell it what files to look for (swift), how it can detect the root directory, the name of the command, etc. And then, more importantly, start the LSP, and attach it to the buffer.

My config looks like this:

 local swift_lsp = vim.api.nvim_create_augroup("swift_lsp", { clear = true })
 vim.api.nvim_create_autocmd("FileType", {
 	pattern = { "swift" },
 	callback = function()
 		local root_dir = vim.fs.dirname(vim.fs.find({
 			"Package.swift",
 			".git",
 		}, { upward = true })[1])
 		local client = vim.lsp.start({
 			name = "sourcekit-lsp",
 			cmd = { "sourcekit-lsp" },
 			root_dir = root_dir,
 		})
 		vim.lsp.buf_attach_client(0, client)
 	end,
 	group = swift_lsp,
 })

This is Lua code, so use it in whatever .lua file makes sense to you. However, if you just want to include it in a .vim file, you'll need to wrap it like so:

" lsp
lua << EOF
-- lua code goes here
EOF

After that, you should be able to write terrible Swift code and have it tell you all the things that you're doing wrong.

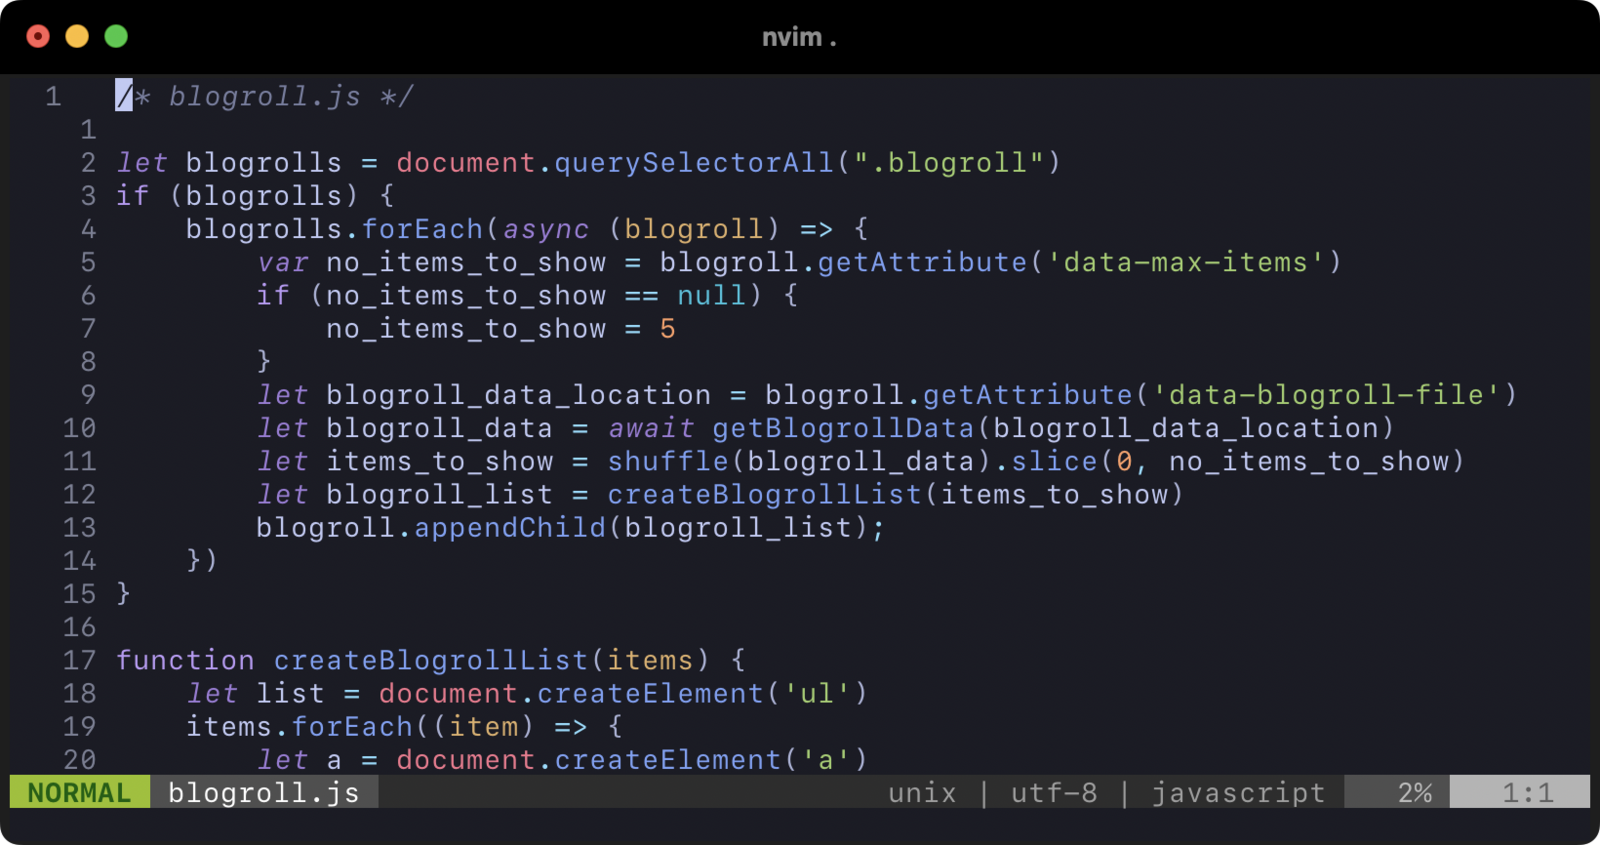
Like this, for example:

swift lsp

For reference, my Neovim config is available on GitHub.

Text Case Is Coming to the Command Line

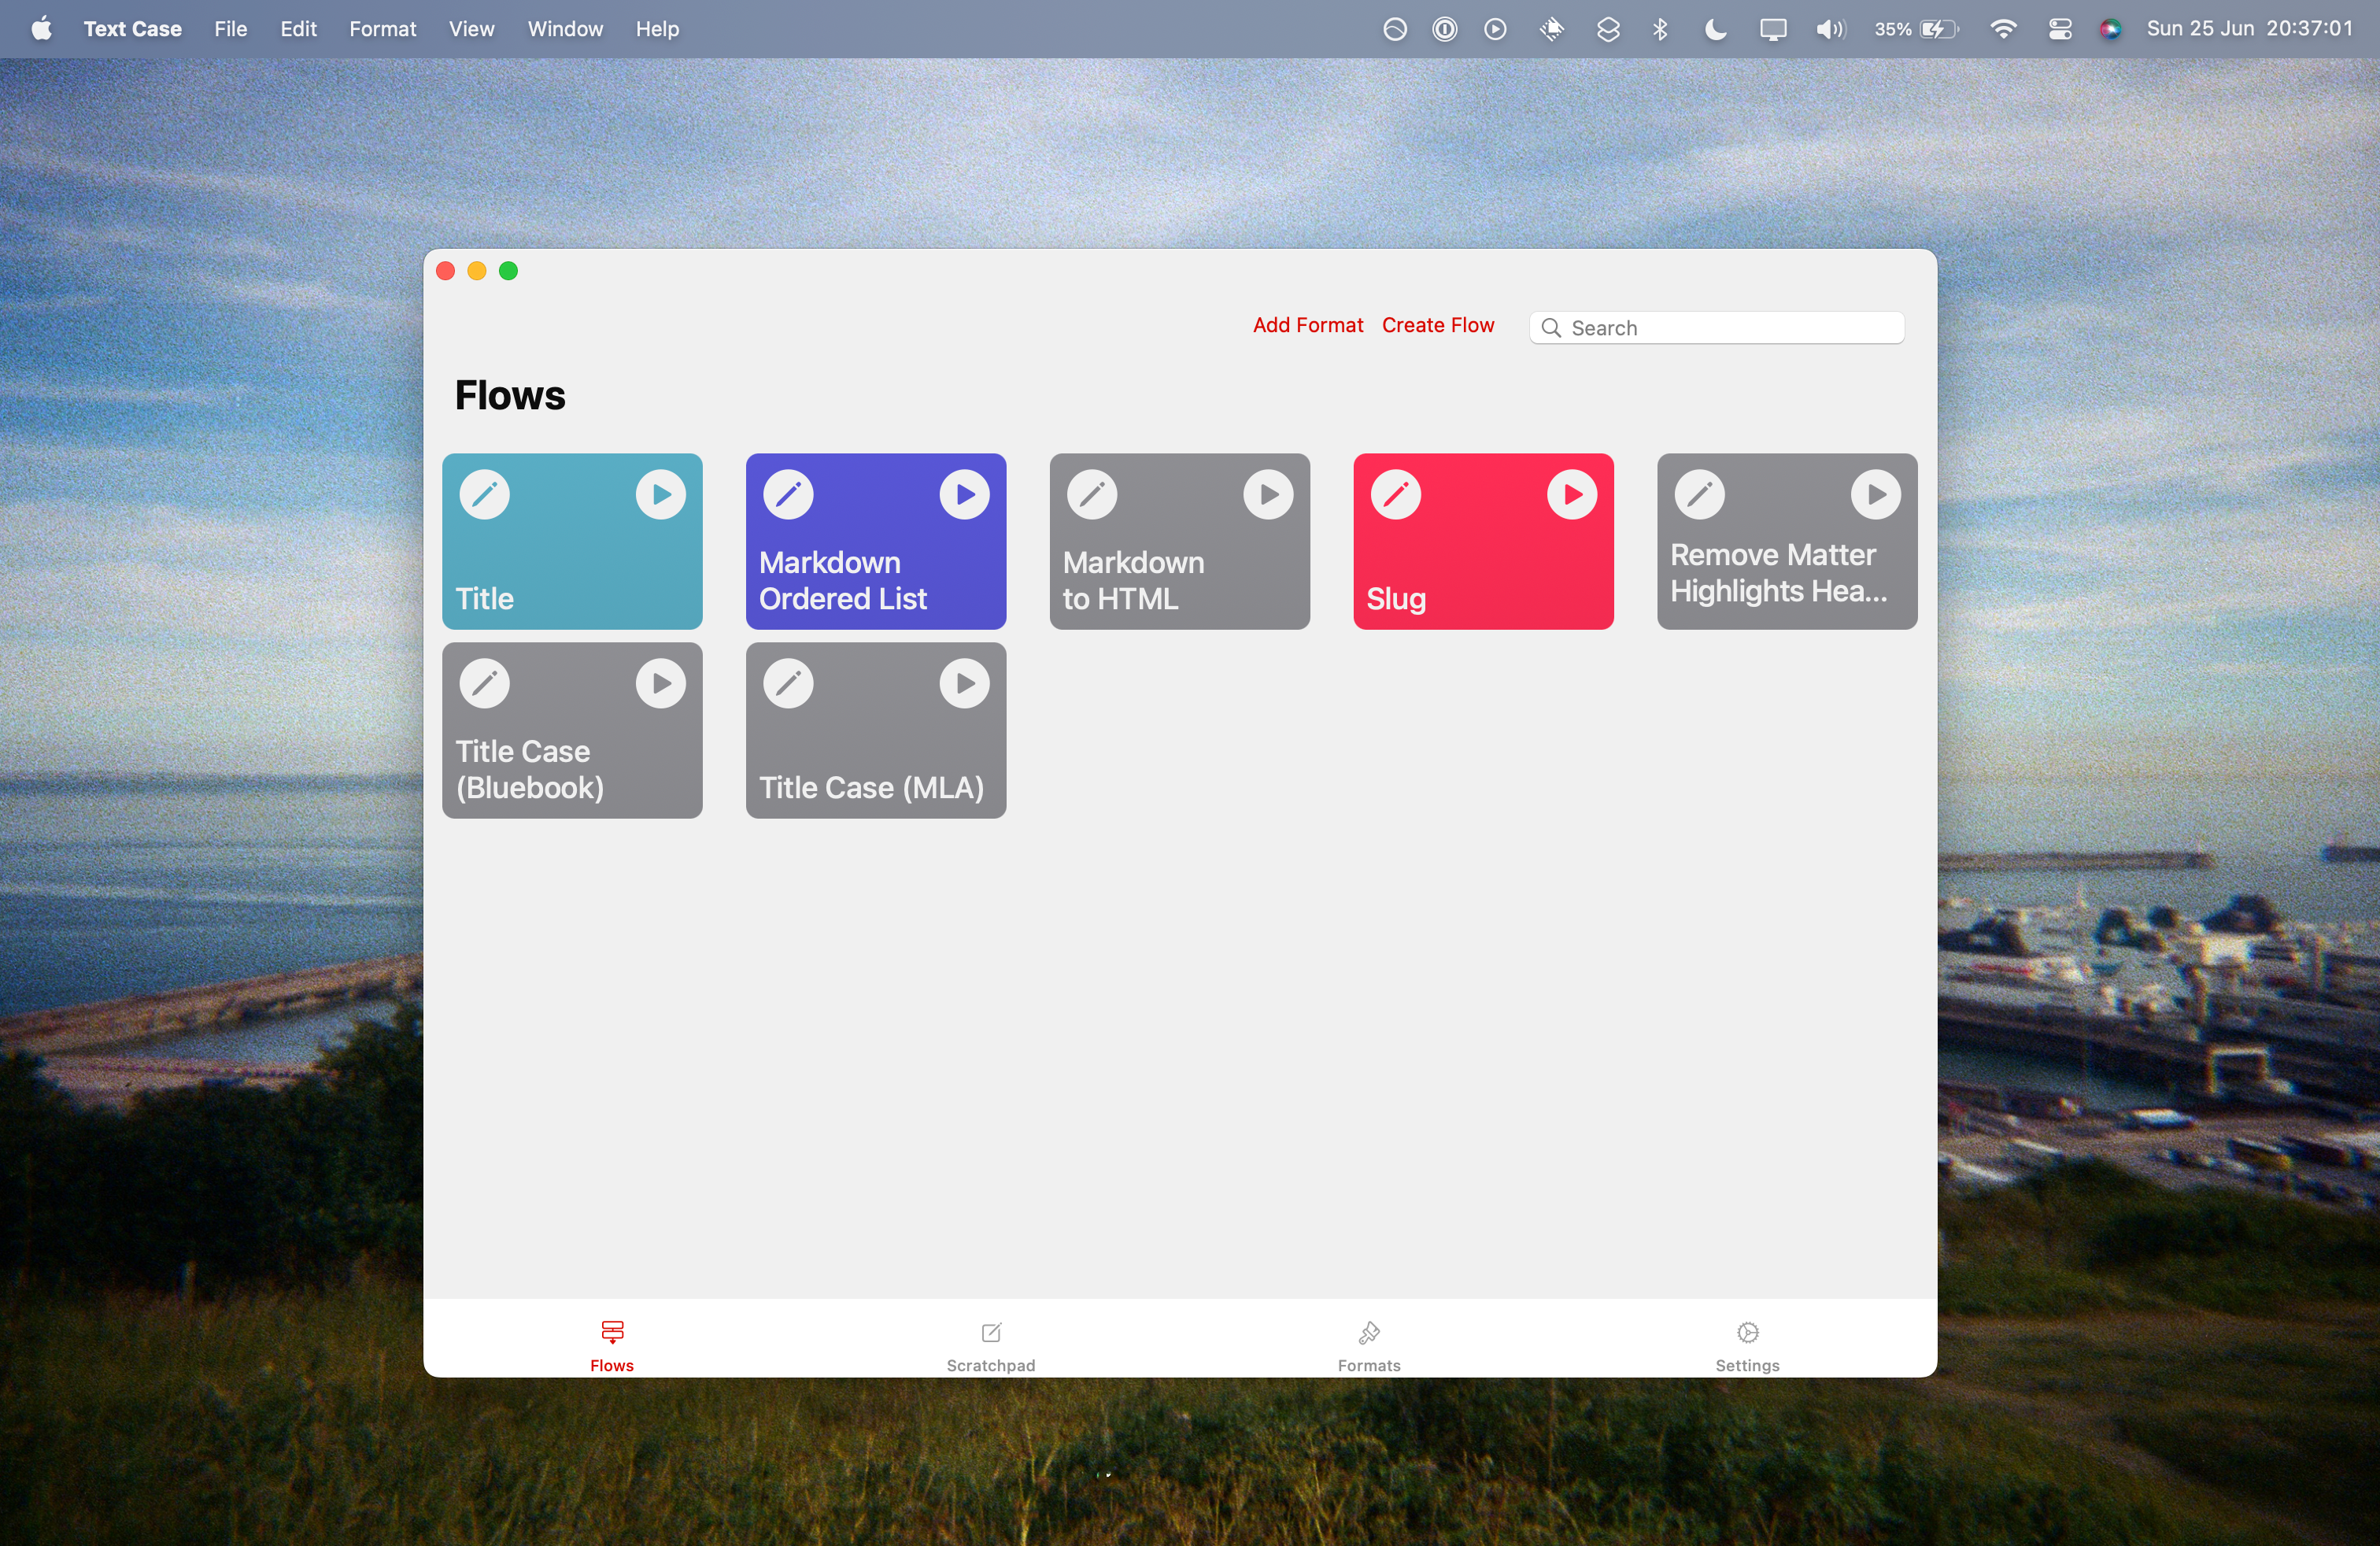
If you didn't already know, I make a text transformation app for iOS, iPadOS, and macOS, called Text Case. It's grown quite a bit over it's lifetime, supporting now well over 60 different formats, custom flows, and many more features. And I've now decided, the next place I want to bring it to, is the command line

And not just to be an additional benefit of purchasing the existing apps. This is an open-source project, which eventually I want to distribute via Homebrew.

That may sound weird, seeing as you need to pay to have it on other platforms. Why would I release it for free?

Basically, I'm a fan of free and open-source software. And while I don't think it's crazy to ask for £2.99 for an app that I've put quite a number of hours into making, I do also want to give something back. So, I plan on building a version of Text Case that will allow people to quickly transform text, using the command line.

At the same time, I'm bound to improve my own programming skills, seeing as my code will now be in the public eye. And maybe I'll learn more about building and distributing open-source software.

However, I do have to say that not all of Text Case will be coming to the command line. I only plan on adding support for the core formats. At least, that's the plan for now.

Right now, it supports just 17 different formats, and I'll be working on bringing the rest over as time goes on. And because it's open-source, you can keep up to date with the current state by checking it out on GitHub. (You can even use it right now, if you're comfortable with building from source.)

Here's a quick screenshot of the current version in action:

textcase cli

I hope this news sounds good to at least some of you. In the mean time, I'm going to get back to adding more format options.

Configuring Nginx to Work With Hugo’s "Ugly" URLs

I recently migrated my blog from running on Ghost to Hugo. With that, came a few changes to how the pages were built, how the URLs were formed, and also the rules around showing 404s and redirecting where possible.

In a default Hugo installation, individual blog posts are each written as index.html files inside a directory named after the given slug. So you would end up with something like so:

blog/
├─ hello-world/
│  ├─ index.html
├─ about/
│  ├─ index.html
├─ my-first-blog-post/
│  ├─ index.html

That means when someone visits either /hello-world or /hello-world/, they'll be taken to the content (Which is actually stored as /hello-world/index.html).

Just to make things difficult, I didn't want my file structure to look like that. It felt wrong. Instead I wanted each blog post to be generated as it's own html file, with the slug being the filename.

Fortunately, Hugo has an option called uglyURLs, which does exactly that. So the same structure above would instead look like this:

blog/
├─ about.html
├─ my-first-blog-post.html
├─ hello-world.html

However, while this may look good to me. It introduced a few issues that I had to deal with. Primarily being that the .html extension had to be given for a page to load. There was no more /about being redirected to /about.html. And definitely no /about/ being supported.

That obviously would break a lot of past links to my blog posts. So I had to find a way to deal with this.

So I set about finding a way in nginx, to essentially remove the need to have the extension in the URL. But I then realised, that it wasn't that simple.

Because, let's say I have an about page with the filename about.html. Ideally, I want /about.html, /about, and /about/ to redirect to this page. But at the same time, I have a mini-site for my app, Text Shot, that sites at /text-shot/index.html, and ideally I want /text-shot/index.html, /text-shot/, and /text-shot to all redirect to this site.

That led me to a lot of Googling, regular expressions, and quite a bit of time spent trying various options in my nginx configuration. (If you were super unlucky, you may have hit a 404 while I was testing).

By default, my nginx configuration handled the requests with the try_files function:

try_files $uri $uri.html $uri/ $uri =404;

Basically, if request was /about, it would try to fetch a file from these locations (in order): /about, /about.html, /about/, and then if all of those fail, produce a 404.

The code to deal with removing the need to include .html was relatively simple. All it does is check if the request includes the extension, and if so, remove it and perform a 302 redirect to the plain URI.

if ($request_uri ~ ^/(.*)\.html(\?|$)) {
    return 302 /$1;
}
try_files $uri $uri.html $uri/ $uri =404;

However, that still meant that if you visited /about/, it would think you were looking for /about/index.html, rather than the /about.html page.

So, I had to then add another redirect. So if the url ended in a trailing slash (but wasn't just /), it would also perform a 302 redirect to a url without the trailing slash. I ended up with this:

location / {
    if ($request_uri ~ ^/(.*)\.html(\?|$)) {
        return 302 /$1;
    }
    if ($request_uri ~ ^/([-a-zA-Z0-9@:%_\+.~?&//=]*)\/$) {
        return 302 /$1;
    }
    try_files $uri $uri.html $uri/index.html $uri/ $uri =404;
}

For reference, $uri is the full request URL, and $request_uri is anything after the host.

There's bound to be a way for this logic to be improved. But as far as I can see, it works how I expect, and it gives me the exact behaviour I was looking for.

Now for some examples. First off, the ways in which you would get to a file located at /about.html:

(Note: all redirects are stated, the rest is the priority order of the try_files function.)

  1. /about.html: 302 to /about -> try /about -> try about.html.
  2. /about/: 302 to /about -> try /about -> try about.html.
  3. /about: try /about -> try /about.html.

And for the page located at /text-shot/index.html:

  1. /text-shot: try /text-shot -> try /text-shot.html -> try /text-shot/index.html.
  2. /text-shot/: 302 to /text-shot -> try /text-shot -> try /text-shot.html -> try /text-shot/index.html.
  3. /text-shot/index: try /text-shot/index -> try /text-shot/index.html.
  4. /text-shot/index.html: 302 to /text-shot/index -> try /text-shot/index -> try /text-shot/index.html.
  5. /text-shot/index/: 302 to /text-shot/index -> try /text-shot/index -> try /text-shot/index.html.

Note: nginx will search for an index file when try_files checks $uri/, so there's no need to handle that. However, there were circular redirects when /text-shot/ would be redirected to /text-shot, and then eventually back to /text-shot/, so I added an explicit attempt to $uri/index.html to avoid this.

Admittedly, a few of those examples are a bit odd, and likely will never happen. But I had to cover all bases.

As you can see, it's not perfect. There are some requests that go through a 302 just to end up at the exact page that was requested. Like #2 above.

In an ideal world, I'll never touch this configuration again. And there's also a low chance that anyone reading this would ever need to do anything similar. But, I can't say I found many resources online for my specific scenario, so I thought I'd write my own.

I guess I brought this all on myself when I decided I wanted to both install my own custom Hugo blog on a linux VM, and to also want static files with the full filename, not just convenient "pretty" URLs that Hugo generates by default. Oh well, at least I learned a bit more about how to configure nginx I guess.