Using GitHub and Xcode Together
It’s been just under a year since I published my article on how to connect an Xcode project to a GitHub repository. Since then, Xcode has kept being updated with new Source Control features, and the guide started to break. So I’ve decided to start fresh and show how you can quickly and easily use GitHub to track your Xcode project.
The Xcode used for this guide was version 10.1.
We will first go through initialising a Git repository, finding the Source Control features in Xcode, and then either link it to an existing GitHub remote, or create one directly inside Xcode.
Initialising a Git Repository

You will need to make sure your project is inside a Git repository. The easiest way is to check the “Create Git repository on my Mac” checkbox when first creating the project, but you can also use the git init command1 to create one inside the root folder.
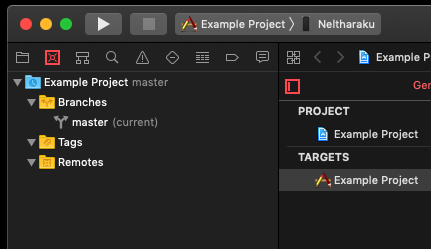
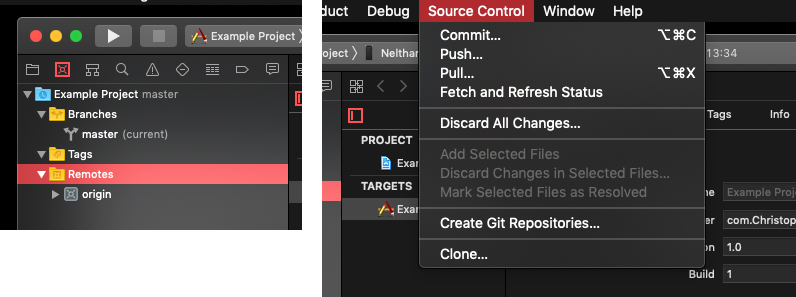
Once your project is being tracked by Git, you will see your project in the Source Control pane on the left of Xcode. It’s the second icon from the left, and you can quickly access it using CMD + 2.
This shows any local branches, tags, and also any remote repositories you have set up, along with remote branches. So you’ll be able to use this pane, along with the Source Control option in the menu bar to manage your repository once it is set up.
Setting Up a Remote

From this stage you have two options, you can link this repository to an already existing remote you have set up, or you can use Xcode’s new tools to create a new one. Either option can be found by right-clicking on the Remotes folder.
I’ll go through both methods.
Using an Existing Remote
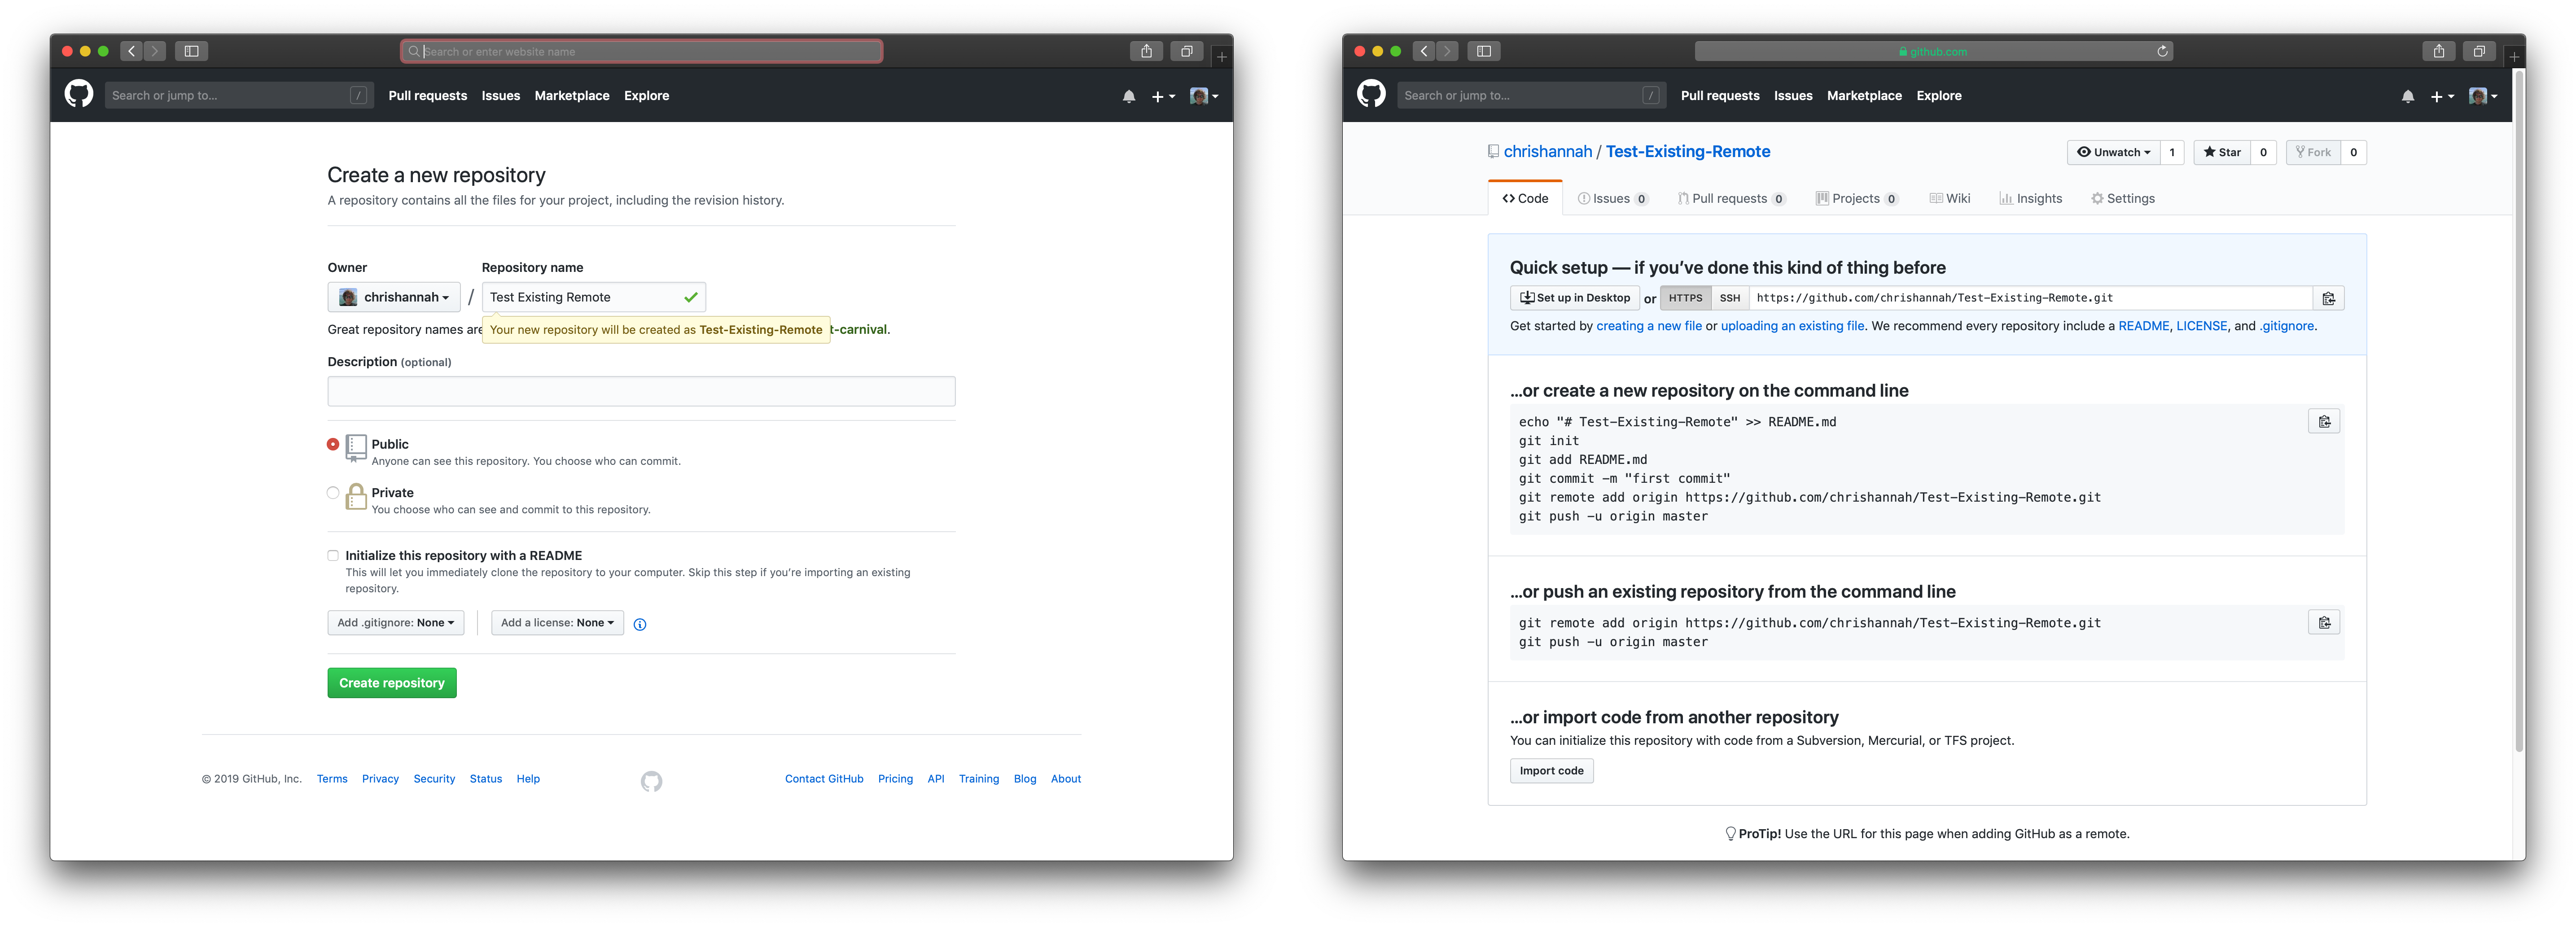
For this example, I created a blank repository on GitHub. Once a blank repository is created, they show you a few ways to initialise the repository. However the only thing you’ll need is the URL address inside the Quick setup section. For me, it’s https://github.com/chrishannah/Test-Existing-Remote.git .
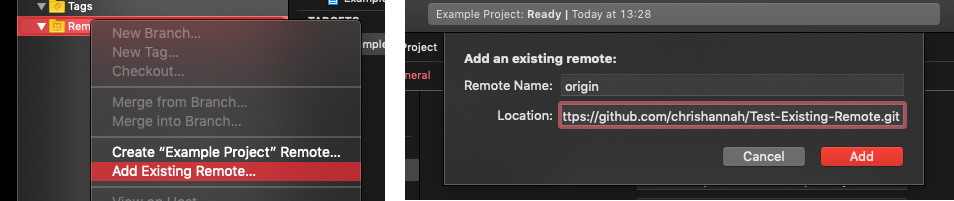
So if you go back to Xcode, right click on Remotes, and select Add Existing Remote, a new window will appear from the top prompting for the location. You just need to paste in the URL you got from GitHub, and select Add.

Once you’ve done that, you should see the new remote appear in the Source Control pane, and you’ll be able to commit, push, pull, etc. from the menu bar in Xcode, along with the usual places.
Create New Remote
If you haven’t got a remote repository set up yet, this is the easiest way to do so, and you don’t even have to leave Xcode.
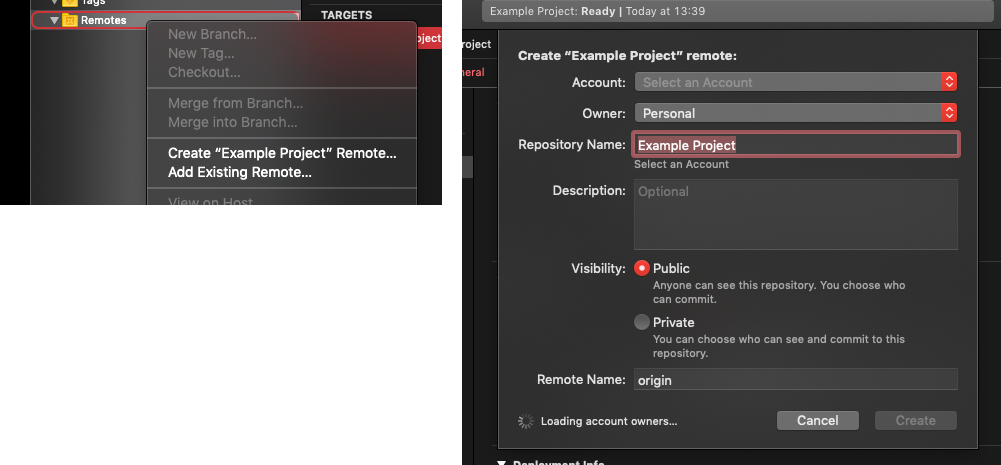
Like before, go back to the Source Control pane, right-click on Remotes, and select Create “Project Name” Remote. You’ll then be presented with a window where you can customise the new repository you will be creating.
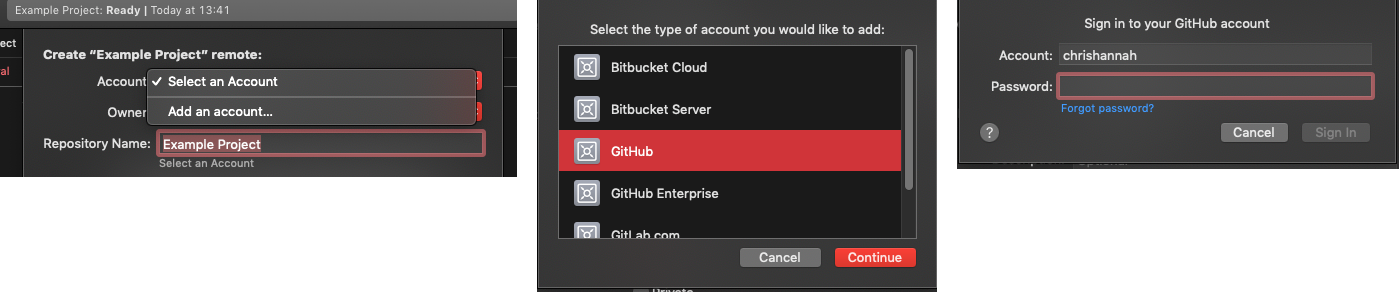
First of all, you’ll need to connect your GitHub account if you haven’t already. To do this just click on the Account drop down menu, tap Add, and then enter your GitHub credentials.
You can then enter a repository name, which will also dictate the URL, an optional description, the visibility of the project, and name you will call the remote in Xcode. The default options are usually fine, although you may want to make the repository private. The last field, remote name, can be left as the default “origin. This is just a label you can give to the remote repository, and if you used multiple, it would be helpful to distinguish each of them. Origin is just the conventional name that most developers use.
Xcode will then create the repost on GitHub, and push your code. You should then see the new remote appear in the Source Control pane, and you’ll be able to commit, push, pull, etc. from the menu bar in Xcode.
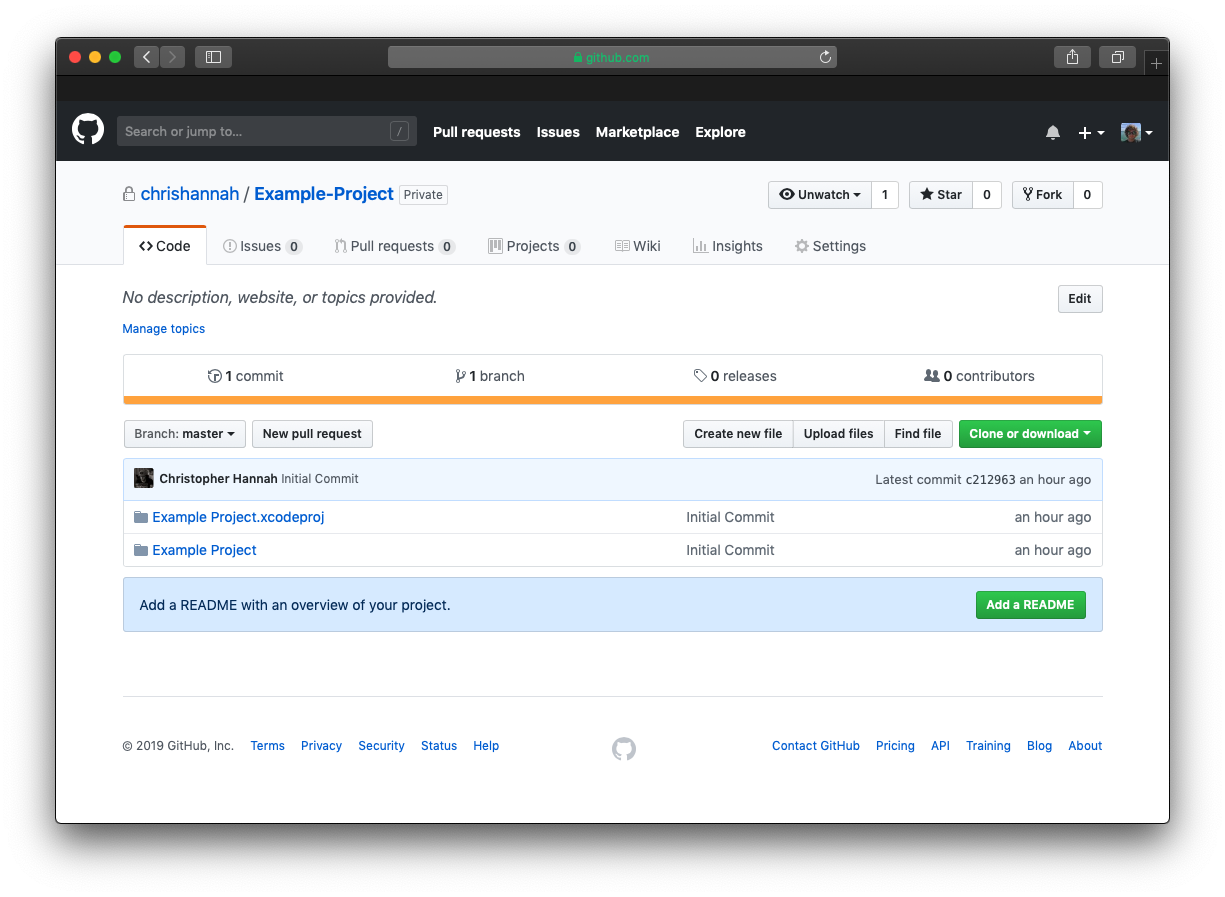
You’ll also find your code on the remote repository on GitHub.
I hope you found this guide helpful. If not, then please let me know either in the comments below, or on Twitter where I’m @chrishannah.